
Painting Troops: Brush, Coverage, Undo
How painting works in We March as One: brush sizes, coverage versus stacking, undo habits, and how to spend a unit budget without wasting bodies.
Painting is the part of We March as One that looks like a gimmick and is actually the whole game. You do not drag units out one at a time; you sweep a brush across the battlefield and the units you own are stamped into the cells underneath it. Get the sweep right and a modest army fights like a large one. Get it wrong and you feed units into a meat grinder a handful at a time.
This page is about the brush itself: how coverage works, when to use each size, and how to stop wasting budget on cells that will never fight.
What the brush actually does
Select a shape in the palette, pick a brush size, then click or drag on your half of the map. The preview shows the footprint — a seven-by-seven square of cells for the small brush, eight-by-eight for the large one. On release, one unit of the selected type is placed in each valid cell inside the footprint, up to the number you own.
Three rules follow from that:
- Coverage is capped by ownership. If you own 100 circles, you cannot paint 120 circle-cells. The brush stops placing when the count hits zero.
- Overlapping strokes waste cells. Painting over a cell that already holds a unit does not stack a second unit there. That cell is simply skipped.
- Cells outside your deployment zone are rejected. You cannot paint into enemy territory or across impassable terrain.
Drag in one continuous motion along the length of the formation, then stop. Correcting a ragged edge with extra taps is how you end up with three units in a corner you will never use.
Small brush versus large brush
The size difference is not cosmetic. Consider a block that should be twelve cells wide and five ranks deep:
- With the large brush you need roughly two horizontal passes to cover the width, and you will overshoot the edges by a cell or two on each side.
- With the small brush you need three passes but can stop exactly on the boundary and shape the corners.
The practical rule:
| Situation | Brush |
|---|---|
| Bulk of a wide, straight line | Large |
| Shaping the flanks or a wedge tip | Small |
| Filling a corridor or a bridge | Small |
| Painting around a building or river | Small |
| Rapidly re-painting a formation you already know works | Large |
Because Setup can be undone freely, the cost of experimenting is low. Paint the block large, then switch to the small brush and sculpt the front edge into a wedge or a concave arc.
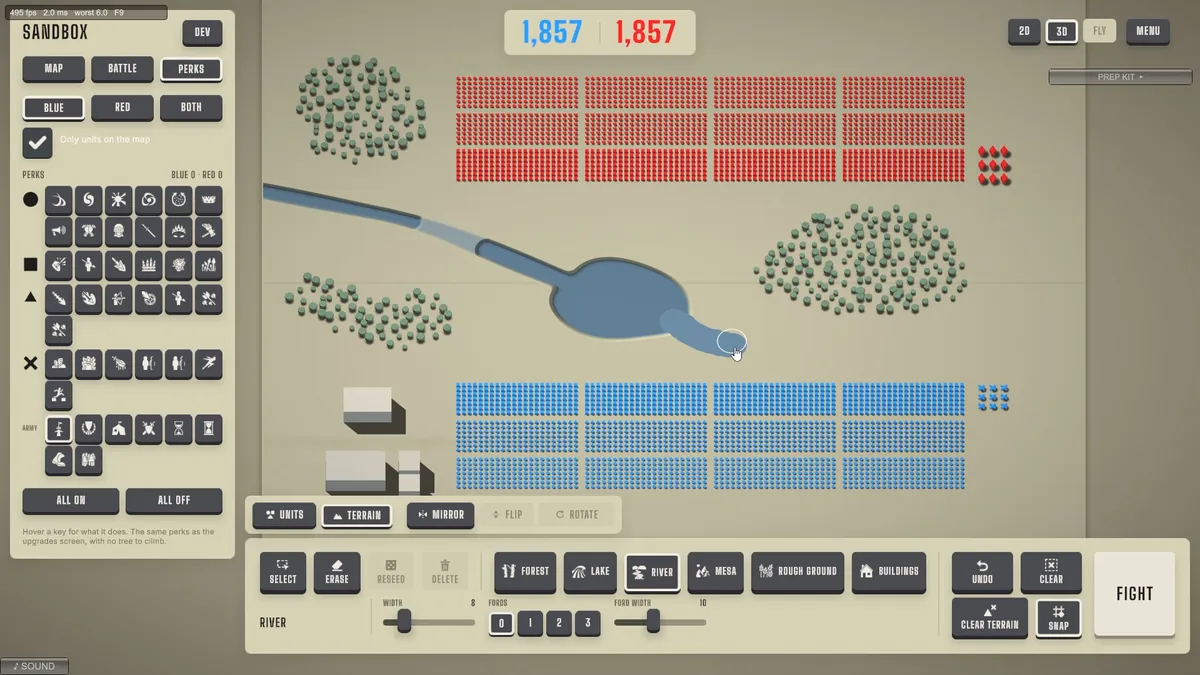
Coverage beats stacking
The most common painting mistake is treating units as a resource to hoard in one place. A dense blob in the centre of the map looks impressive and fights terribly, because only the units on the perimeter can reach the enemy.
Coverage means the fraction of your army that is actually in contact. A wide formation with a shallow depth has high initial coverage but breaks quickly as the front rank dies. A deep block has lower initial coverage but keeps feeding fresh units into the line. The best formations balance the two: wide enough to avoid being flanked, deep enough to keep the line intact after the first exchange.
A workable rule of thumb for campaign levels:
- Width: at least as wide as the enemy's front, plus one or two cells on each side.
- Depth: three ranks minimum, five if the enemy has heavy units in the middle.
- Shape: flat front against a flat enemy line, wedge against a thin or refused flank.
The army composition guide→ goes further into ratios and mixed-shape formations.
Where units get wasted
Four painting habits quietly cost you a third of your army:
- Painting into terrain. A river or wall cell rejects the stroke, but the units that would have occupied it are still counted in your budget in some levels. Check the preview: cells that will not accept units are shaded differently.
- Painting behind the deployment line. Reinforcement cells at the very back rarely reach the fight before it is decided. Put the depth where the fighting is.
- Painting isolated pockets. A squad on the far side of a building will be surrounded and killed. Either connect it to the main body or do not paint it.
- Painting the wrong shape last. Palette order matters when budget is tight: paint the units you have most of first, then fill with specialists, so the rare units land where you actually want them.
The CLEAR button wipes the entire formation. It is useful when a level's terrain makes your saved mental template useless, but it also throws away the small adjustments you made around a building. Undo strokes instead when you only need to fix the last pass.
Undo discipline
UNDO removes the last stroke, not the last unit. That distinction matters: if your last stroke was a wide sweep across forty cells, undo removes all forty. If it was a single tap to fix a corner, undo removes one.
That makes a productive painting order:
- Paint the bulk with wide strokes.
- Check the counter and the preview.
- Fix edges with single taps.
- If a wide stroke was wrong, undo it immediately rather than painting over it.
Painting for the order you chose
The formation and the standing order are a single decision, not two. Painting a deep defensive block and then selecting MARCH throws away the depth advantage: your block walks forward, compresses, and hits the enemy with less contact area than it had at the start.
- HOLD rewards a wide, shallow arc with refused flanks — you want the enemy to hit your entire line at once.
- MARCH rewards a wedge or a deep block with a narrow front — you want to punch a hole and pour through it.
The MARCH vs HOLD guide→ has the per-map version of this, including how to handle rivers and city walls.
Official source: We March as One on Steam ↗ — the store description states that you paint troops directly onto the battlefield however you like, and that each soldier is simulated individually.
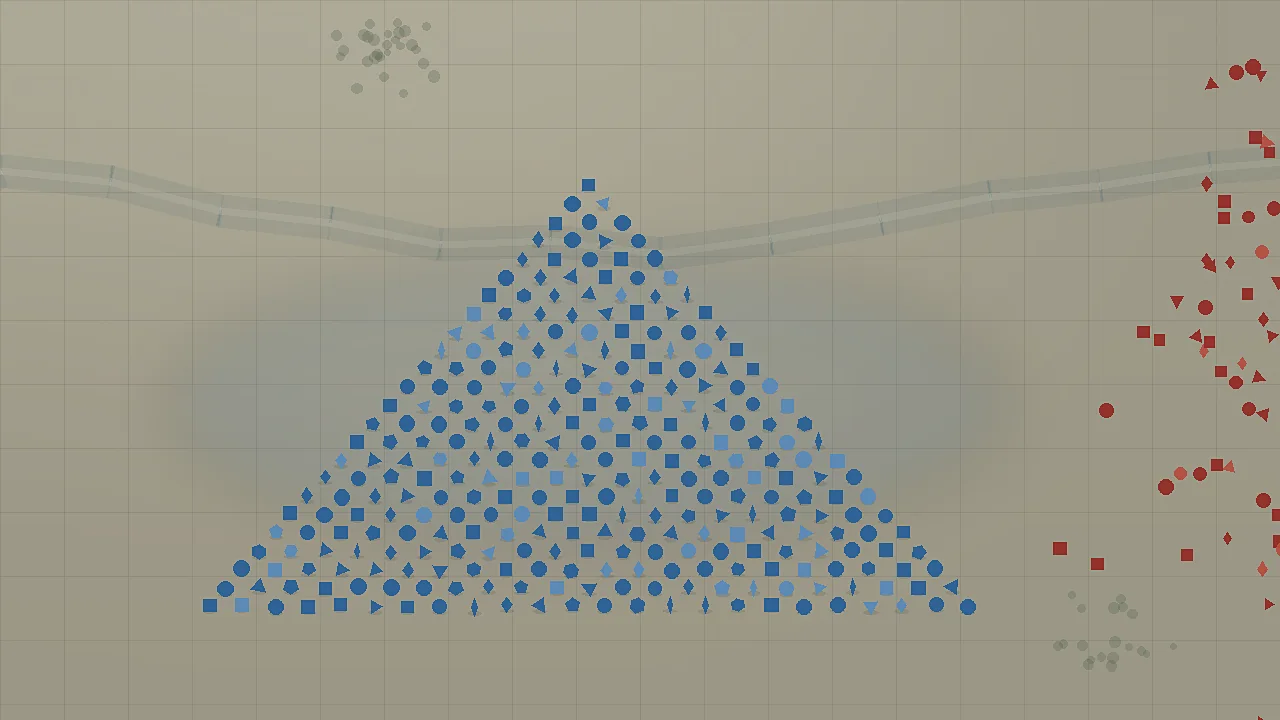
A practical painting checklist
Before pressing FIGHT, run this list:
- Is the front at least as wide as the enemy's?
- Is there a second and third rank behind the first?
- Did any units land in cells that will not fight — behind a wall, across a river, in a corner?
- Is the rarest unit type in the position where it matters, or buried at the back?
- Does the formation match the order: wedge for MARCH, arc for HOLD?
If all five are yes, the battle is usually decided by army size and upgrades, not by the paint job. If any are no, fix them — Setup is free.
Sources
- We March as One on Steam (official store page) ↗
- Steam Community discussions for We March as One ↗
- Steam user reviews for We March as One ↗
FAQ
Does painting over my own units add more units?
No. A cell holds one unit. Painting over an occupied cell skips it, so overlapping strokes waste brush time but not units.
Can I paint during the battle?
No. Painting happens in Setup only. Once you press FIGHT, the formation is locked.
Is there a way to save a formation?
The game does not provide named formation presets. CLEAR and UNDO are the only editing tools, so most players keep a mental template per level type and repaint it from memory.
Why do some of my units never reach the fight?
Either they are painted behind terrain that blocks movement, or the battle ends before the rear ranks arrive. Both are coverage problems: move the depth closer to the contact line.
Does brush size affect unit strength?
No. Brush size only changes how many cells a single stroke covers. The units placed are identical.